Showing posts with label nail art. Show all posts

Wednesday, 21 October 2015

Bonprix UK Nail Art Competition #PartyPolished

Today I have a very late entry to the Bonprix UK nail art competition! Bon prix is an online clothing retailer with tons of beautiful outfits! For the competition I had to take inspiration from one of their affordable party wear collection dresses. They gave 6 different dresses ranging from colour block to animal print, sequin, lace, everything! I literally had an idea for every dress. The first prize winner will win a £50 voucher to spend at Bonprix as well as lots of Barry M goodies. Second and Third place will win the dress that they were inspired by along with 4 Barry M speedy quick dry nail polishes.

I was in LOVE with this gorgeous lace dress and if I were to win any of the dresses, this is the one that I'd want! :D

I had a very clear idea in my mind, but it's a technique I'd never done before... I was very nervous!

I am absolutely rubbish at anything stamping, I just fail every single time. But the only way to get a gorgeous lace pattern was to stamp, I am rubbish at stamping, but trying to create a design like this freehand would be an even bigger disaster!

I started off by creating my own sheer black polish. I just added a few drops of my black polish into a topcoat that I never use. I applied to coats to my nails.


I used Pretty Serious cosmetics Absence for the stamping. It worked great at picking up the full image, but for some reason I had issues trying to transfer the image onto my Uber Chic mat. That's probably my fault - like I said, I can't stamp to save my life!

So I applied a topcoat to my design on my stamper. I let it fully dry and then slowly and carefully peeled it off using tweezers. I applied topcoat and then applied it onto my nails, almost like a sticker (see below!).

I used my clean up brush to get rid of the excess nail polish.


I then used the same technique to add the white lace bits.

This time I used Pretty Serious Cosmetics Presence, it's a 1 coat white!

I carefully placed the white lace design onto the edges of my middle finger and ring finger.

I applied a topcoat to smooth everything out.

To finish off the design I added a black outline. I feel like it makes the design look much more completed.

I am seriously in love with it.

This is something I've never done before, I photographed every step of the way, just in case I messed up somewhere!

I love how delicate it is, it's very feminine and unique.

Check out Bon Prix and all their lovely dresses!

The competition ends TONIGHT at midnight!

Thursday, 1 October 2015

Nail Mail Nail Art Stencils - How To

I've been using nail art stencils from Nail Mail for the longest time and although I use them in tons of tutorials, I've never actually done a post exclusively on the stencils!

I bought my first nail art stencils ever from Nail Mail and sent Kelly, the mastermind behind Nail Mail, a few photos of my designs. They were pretty rubbish back then to be honest. I didn't really know what I was doing!

Ever since then Kelly and I have been working together. She has sent my crazy amounts of her stencils and I happily use them for my nail art. She never asked me to use them, promote them or review them, I just genuinely enjoy using them.

I created this single chevron zig zag-y look. This stencil is called the Chevron Points.

I started off with a cobalt blue base. I applied 2 coats and then applied a fast drying topcoat. I waited for a good 10 minutes before doing anything else.

It's important to wait until the nails are 100% dry. If your nails touch dry but still wet underneath you'll pull the nail polish off with the stencil! I have to say... this is something I've done more than once!!

Once you've waited (at least) 10 min, you can apply the stencil. Just pull it off the paper and carefully put it on your nails. I tend to just use my hands for this, no fancy tweezers! But I know a lot of people find it easier to apply it with tweezers. I don't have very steady hands using my hands gives that extra bit of support.

Once you've put the stencil on your nail you have to make sure it's pushed down properly. Not just the top of you nail, but you also have to push it down properly around your cuticles. Again you can use the tweezers to push it down, or a cuticle pusher.. I just use my nails. If the stencil isn't pushed down properly you can have polish leaking underneath the stencils and you won't have those crips lines.

Now it's time to apply your second colour!

I used a contrasting black polish.

When applying the nail polish I try to stick to the design of the stencils. So for this stencil I painted the cuticle area first, and then just filled in the zig zags.

I find that when I just paint my nail like I normally would I get too much polish on the stencil itself and it could get a little messy removing it.

Another easy peasy way of getting crisp lines without any risk is the sponge the second colour on. Like you're doing a gradient, but just 1 solid colour! This way you won't run the risk of adding a too thick of a coat and ruining the design when you're pulling the stencil off.

Once you've applied your second colour it's time to remove the stencil. You want to remove the stencil when the nail polish is still went. Do it ASAP! If the nail polish dries you'll pull off all your nail polish or the stencil could break. Don't rush though, take your time when pulling the stencil off. I follow the design of the stencil so for these I pull it up and down following the zig zag. The stencil is pretty sturdy so as long as the polish is still wet, you won't break it.

The last step is to apply top coat!

I wait another 10+ minutes before applying top coat to any design. Topcoat has this horrible tendency to smear designs. It's literally THE worst.

Normally I take photos pre top coat and after - JUST in case I smudge a design.

If you're really worried about ruining your design, you can apply 2 coats of topcoat. The first coat will follow the zig zag design, once that's dry you can add a normal topcoat. This way you won't run the risk of smudging the 2 colours together.

I used to apply top coat like I would apply any polish, but I've learned to only have the polish touch your nail, not the brush. Does that make sense? I use a very very light touch so I'm not pressing the brush onto my nail. This also helps eliminate the design smearing all over the place.

That's it!

I feel like it sounds a whole lot more complicated that it really is. The most important step is actually the first step. Make sure your base colour is 110% dry before even starting anything else. It's happened so many times that I create this great design, pull off the stencil and the nail polish comes off with it! Trying to fix that is more work than starting all over again...

I hope this was a helpful guide on how to apply nail stencils!
xx

Wednesday, 30 September 2015

Jungle Nail Art - Monthly Challenge

This month I'm taking part in a monthly nail art challenge Clairestelle8 created on Instagram. Every couple of days there is a different theme. To make it even crazier, I decided to do bestie twin nails for every theme!

The theme for the 19th was Jungle and I collaborated with Ebba from @nailsby_ebba.

We decided to do a colourful leopard print design!

I don't have a tutorial for these, honestly I'm not very good at leopard print!

To check out all the other themes this month, click here!


I started off with a white base using Pretty Serious Presence. This is a 1 coat white!!

After that I just apply some random blobs in different colours. Yep very technical!

I used all Kester Black polishes for this:
Tutti Fruiti (gorgeous purple I'm holding in the other photo!), Alimony (the turquoisey green), Blue Raspberry (cobalt blue) and Sorbet (raspberry pink).

I finished it off by outlining the blogs using my Barry M nail art pen. This is pretty much like a sharpie! It's super easy to use. You don't get the thinnest lines, but for something like this it's perfect!

That's it!
xx

Tuesday, 29 September 2015

Fav Song Nail Art - Monthly Challenge

The theme for the 15th of September was Fav Song.

This month I'm taking part in a monthly nail art challenge. Every couple of days there is a different theme. On top of all that I am doing #bestietwinnails for every theme! For the 12th I collaborated with Gemma from @_nailgems_.

Thinking of something to do for favourite song was difficult enough, but to do something together.... no way.

So I decided to think a little (a lot) outside the box and think of children's songs... which then lead to Twinkle Twinkle Little Star... and galaxy nails.

Makes sense right?!?

I do have a tutorial of these coming up on my YouTube channel and as soon as it's ready I'll post the link here :)


I started off with a dark blue base. I used The Lacquer Lab Blue Jean Baby.

I used a liquid latex around my nails and stared sponging on random colours. I used Nail Mail's Mess Free Mani.

I wanted to have quite a bright galaxy so I used lots of brighter blues and a pink.

I started off by sponging on white, just to make the other colours pop.

Next I sponged on Barry M Guava - the polish I'm holding in the photo. This is a great bright pop of colour!

I then applied Ulta3 Fruit Tingle a bright neon pink.

This was followed by Barry M Blue Grape. This is a dark cobalt blue and I used this just to mix the other colours into the background.

At this stage, it looks pretty rubbish! But adding a glitter topper makes ALL the difference. I used Barry M Diamond Glitter and it's a stunning silver holo. This is probably my most used polish of all time.

That's it!

xx

Sunday, 27 September 2015

Mermaid Nail Art Born Pretty Store Review - Monthly Challenge

Today I have another nail art design to show you from #clairestelle8sept monthly challenge!

This month I'm taking part in a nail art challenge where every couple of days there is a different theme. To make it even crazier, I decided to do bestie twin nails for every theme!

The theme for the 12th of September was Mermaid and I collaborated with Bethany from @bnailedtoperfection. We decided on doing the mermaid design on the middle and ring fingers and using shell studs on the pinky and index finger. And our general theme was blue.

I loved how both of ours turned out!

I didn't create a tutorial on these, however I have something very similar on my channel already here!

Check out all my other designs for this challenge here!


I started off by painting my outer 2 fingers black and my middle 2 fingers white.

I applied a fast drying topcoat to my middle and ring finger and waited for a good 10 min before doing anything else.

I applied some liquid latex around my nails (Charming Tale Practical Magic) and once that was dry I placed the mermaid scale stencil onto my nails.

I first sponged black polish over the stencil. The black base will really make the shimmery polishes pop.

I used a cheap Primark cosmetics sponge and applied Charming Tale The Huntsman and Frightfully Spectacular Orinoco Flow in random positions on the sponge.

I then dabbed it onto my nail, like any other gradient.

I applied 2 "coats".

When the nail polish was still wet, I gently pulled the stencil off, the liquid latex barrier will peel off at the same time.


For the studs I used this set up studs from Born Pretty Store (#20312). This comes in a case and has all sorts of different studs including stars, hearts, seashells, pointed studs, square studs and much more! Most things come in both silver and gold!

I love that it comes in a little box instead of little plastic bags. It's incredibly easy to keep organised this way!

I used the silver seashell studs. They're super cute and worked perfectly with the mermaid scale design.

I applied a dot of topcoat onto the base of my index finger and pinky. I can carefully picked up a seashell stud with a pair of tweezers and applied it onto my nail.

That's it! I really like how this design turned out! I love the subtle mixed gradient of the mermaid nails and the studs really help bring the look together.

xx Elaine


Saturday, 26 September 2015

Mosaic Nail Art Tutorial - Monthly Challenge

This month I'm taking part in #clairestell8sept monthly challenge! Every couple of days there is a different theme. To make it even crazier for myself, I actually decided to do #bestietwinnails for every theme!

Check out the other posts here!

For the 9th of September the theme was mosaic and I collaborated with Shakuh_05 from Instagram.

This design is inspired by @MaryMonkett.

I have a tutorial for these on my YouTube channel!


I started off with a nude base using 'Ard As Nails Sharona.

I then used the dry brush technique and applied brush strokes of different neutral colours. I used Pretty Serious Presence (white), OPI Designer De Better (shimmer), OPI I Sâo Paulo Over There (brown), and just to blend it all together I applied 'Ard As Nails Sharona over the top.

I then applied a fast drying topcoat and waited a good 10 minutes.

I then used a geometric stencil from Nail Mail for the triangle design.

I just applied the whole stencil onto my nail and filled in the triangles that I wanted using a black nail polish - Pretty Serious Absence.

I then carefully pulled the stencil off - while the nail polish was still wet! I waited another 5-10 minutes and then applied a topcoat.

That's it!

xx

Friday, 25 September 2015

Personail Nail Polish Strips Review

Hi everyone! Today I have a little bit of a different post for you and something I've NEVER done before!

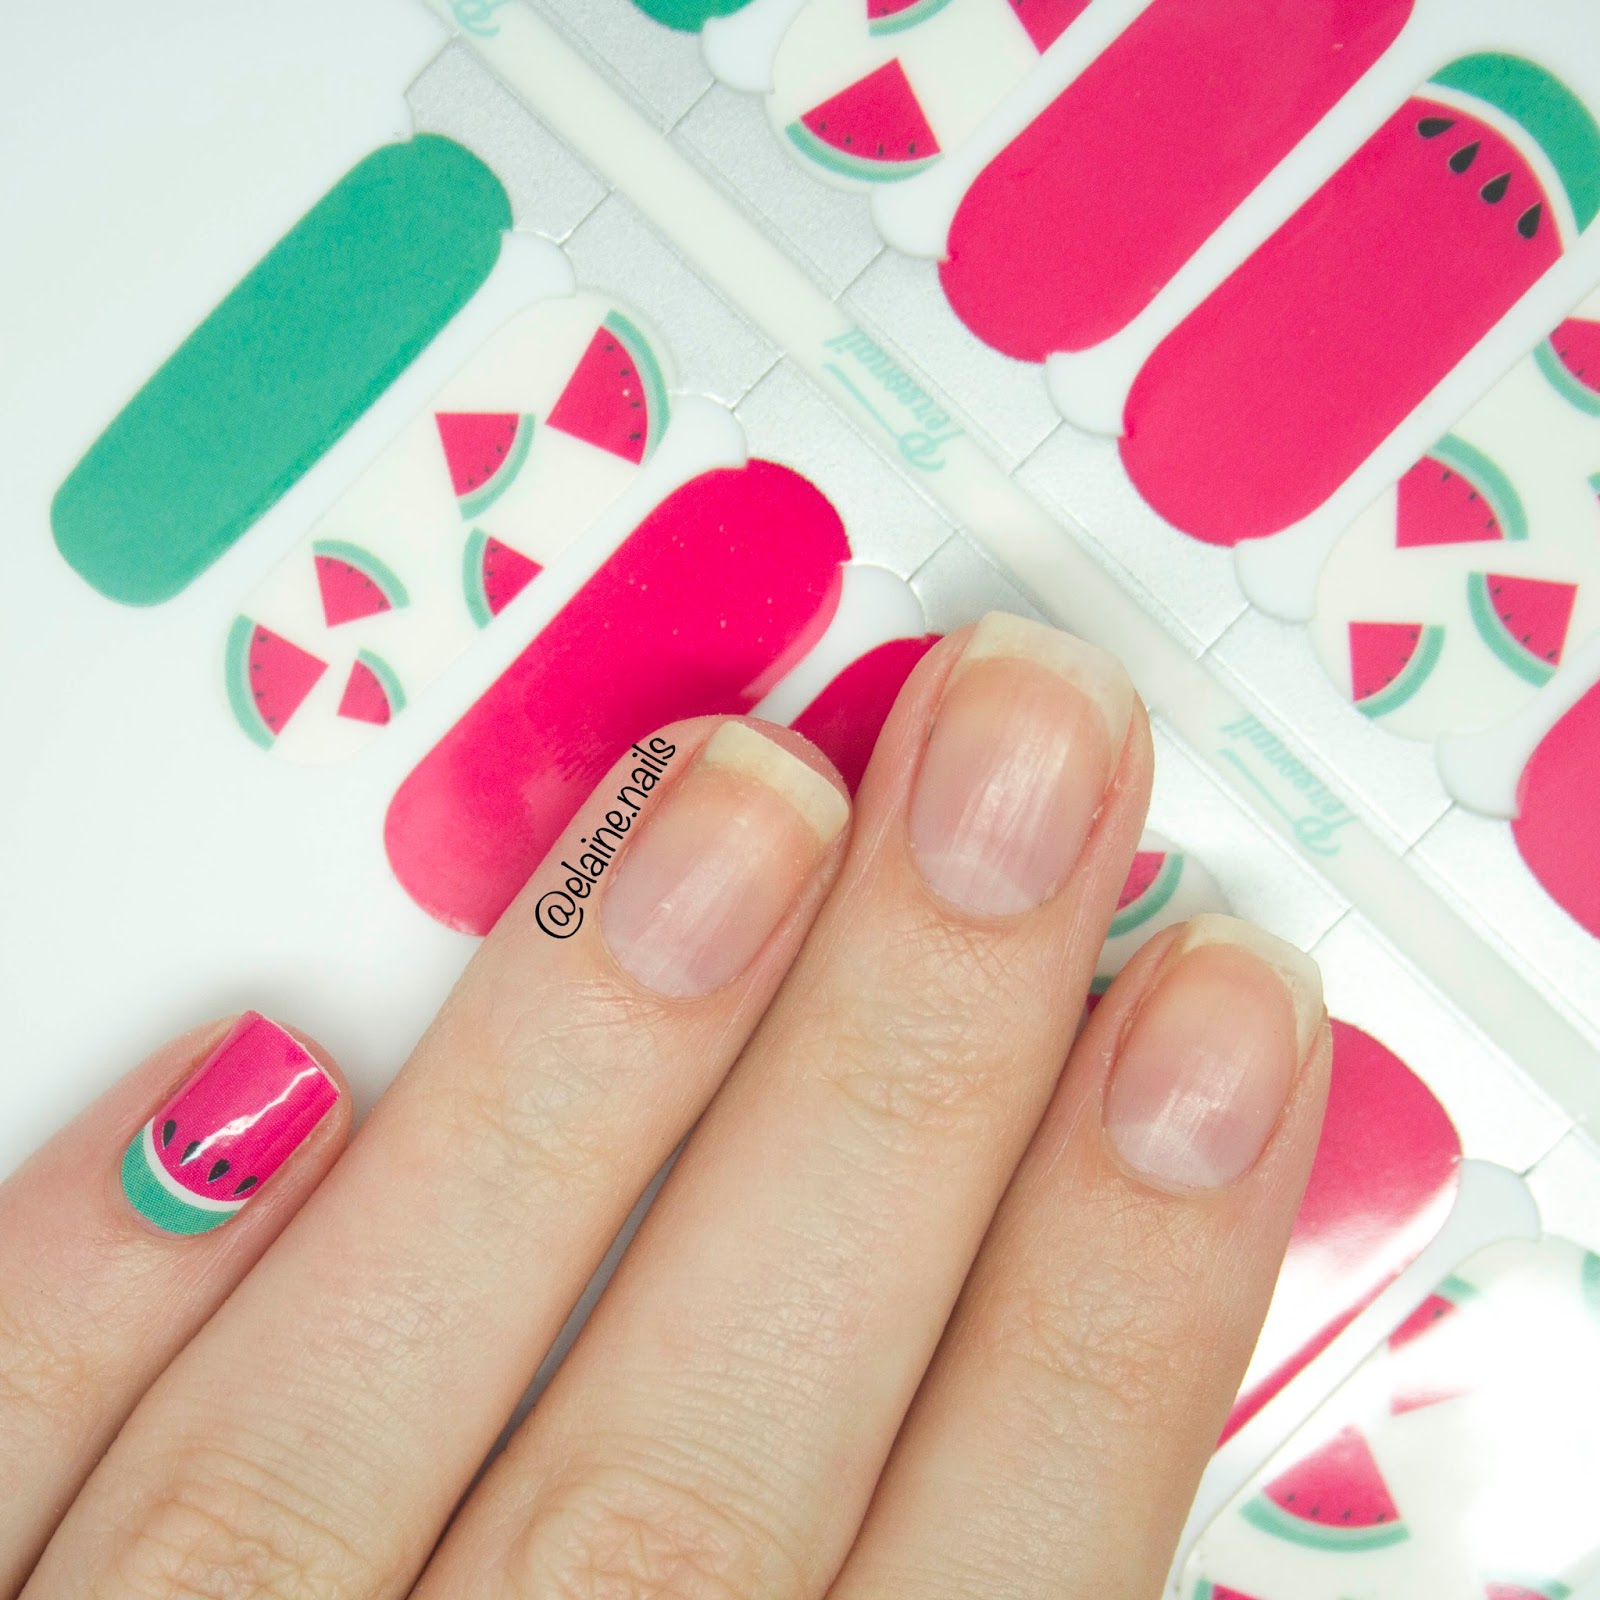
I received some Nail Polish Strips from the brand new Australian based brand Personail. Personail launched their brand on the 23rd of September and they're all about cute nails without hassle and something to fit every occasion.

Their wraps have different "personalities" meaning they have something for everyone. The strips I received are "Charmingly Cute", there is also "Glamour" and "Perfectionist". Charmingly cute has loads of fun, cute, unique and playful prints, Glamour has glitter and metallic designs and Perfectionist has solid colours.

For a brand that has only launched a few days ago, everything looks SUPER professional from the packaging to the website and everything in between.

Before I get started, if you're interested in any of the designs I have a 10% off code for you: EN10


The polish strips cost AU$13 which is roughly £6 (on the 25th of September). Postage to the UK is also very affordable. If you buy 1-2 designs postage is only $3 (£1.38). If you buy 3-4 designs its $6, and shipping is free on orders over $50 (this could be a limited time offer!).

The benefits of adding nail polish strips mean there is zero drying time and no nail polish smell! I paint my nails so often I'm not bothered by the smell anymore, but I always worry about having people come over and as soon as they walk into the house they'll be hit by a cloud of nail polish fumes.

The nail polish strips also last for up to 10 days. I unfortunately wasn't able to test the longevity of the strips because I work as a waitress. I work with a lot of water and I'm constantly polishing cutlery.. nail polish generally lasts through just  one shift. I did actually wear this to work and I didn't have any issues with chipping or anything! Plus everyone commented on how cute my nails were ;).

It has a very professional finish - definitely can't argue that! And lastly they fit all nail types! Each pack comes with 16 polish strips so more than enough to do your nails, make a few mistakes and check which size fits best! The pack also comes with a mini file and a cuticle stick.

Another claim is that they're easy to apply. For someone that's never done anything like this before... yes it was easy! I hadn't done any research on how to apply nail polish strips so it was literally going in blind, just the directions on the back of the packaging.

1. The first step is the check which of the strips fit best for each nail. There are quite a few different sizes so there is literally something for everyone.

Before you start you have to make sure you have clean dry nails. I took off all my nail polish (even base coat).

2. Remove clear protective layer, hold silver panel and peel away from back panel.

Right so you'll be able to see in the video I was a little clueless at this point.

I actually pulled the stencils off from the rest, that way I only have one design in my hand to work with. Much easier.

I then removed both the front and the back. The front is a clear film and the back is paper. Now it's time to apply it to my nails...

3. Position sticker on nail holding the silver tab.

This is pretty straight forward. You aline the sticker with you nails and just stick it on there. At this point it's literally just a sticker.

4. Press firmly to smooth over nail surface. File downwards to remove excess.

So you have to make sure you push the stencil all the way down all along the edges of you nails. You don't want anything sticking up! Once it's all smooth you can start filing.

My nails are pretty short so I actually cut the stencil in half and then started filing. Again, much easier!

It's best to file in a downwards motion. Don't worry you're not actually filing your nails down, you're just filing the sticker. As soon as you see your nail poking through you can stop.

I finished it off with a topcoat so it would last longer

Now the best part... doing my other hand!! It was literally the easiest thing every to my my right hand. I always struggle with nail art and it can take AGES! But since I'd got the hand of these stickers my now it was incredibly easy.

That's it!

How cute do they look?!

I love that it's a different design on every nail. I had the little triangle watermelon design on my thumb as well. This is just the most adorable nail design I've every had on my nails.

I am really impressed with Personail. Don't you just love their brand name?

Although nail polish strips isn't something I'd use all the time, I'm really happy I've tried it. This is great for when you have people coming over, but you still want to have cute nails without have to worry about nail polish smells.

This is also great if you're going on holiday and don't want to bring 100 nail polishes and tools for nail art. Just stick these on and you're good to go!

Another bonus is that if you're not very good at nail art or if you don't have a steady hand this is a great way to be able to have beautiful nails! The fact that they are nail polish strips means that it looks like actual nail polish on your nails, no fake nails, no bumpy thick nails. It just looks like a layer of nail polish.

You can be really creative with these strips. I could have easily used the green sticker and it would look completely different.

The price is amazing! For less than £15 you can have two nail polish strips posted! I highly recommend these.

Remember if you're interested in buying some, don't forget to use my discount code EN10 for 10% off your purchase!

xx Elaine

Friday, 11 September 2015

Rainbow Lighting Bolt Nail Art - Maniswap

Of course doing Bestie Twin Nails for every challenge this month isn't busy enough... I also had to do a mani swap with Leanne from @leasnails!

I love her account and she's just started her very own indie nail polishes called Charming Tale!

I decided to recreate her rainbow watermarble lightning bolt glitter nails and she did my mermaid nails! We even tried to copy each others nail poses... spoiler alert I LOVE her handpose and you might be seeing it pop up more often ;).

I have a video tutorial of these nails on my youTube channel!


I started off creating a watermarble design. Of course I used my Pipe Dream Polish A Night In Vegas collection polishes because that's the only thing I can successfully marble with.

In the video I show how I created this design. I add a drop in every colour twice and create the normal flower design. I then swirl from the top to the bottom to get this design. Does that make sense? Probably not...

Anyway I create the flower design first and then drag it back and forth because I feel like it mixes the colours better.

I applied a topcoat and waited for a good 15-20 minutes before moving on to the next step.. I wasn't taking any chances!

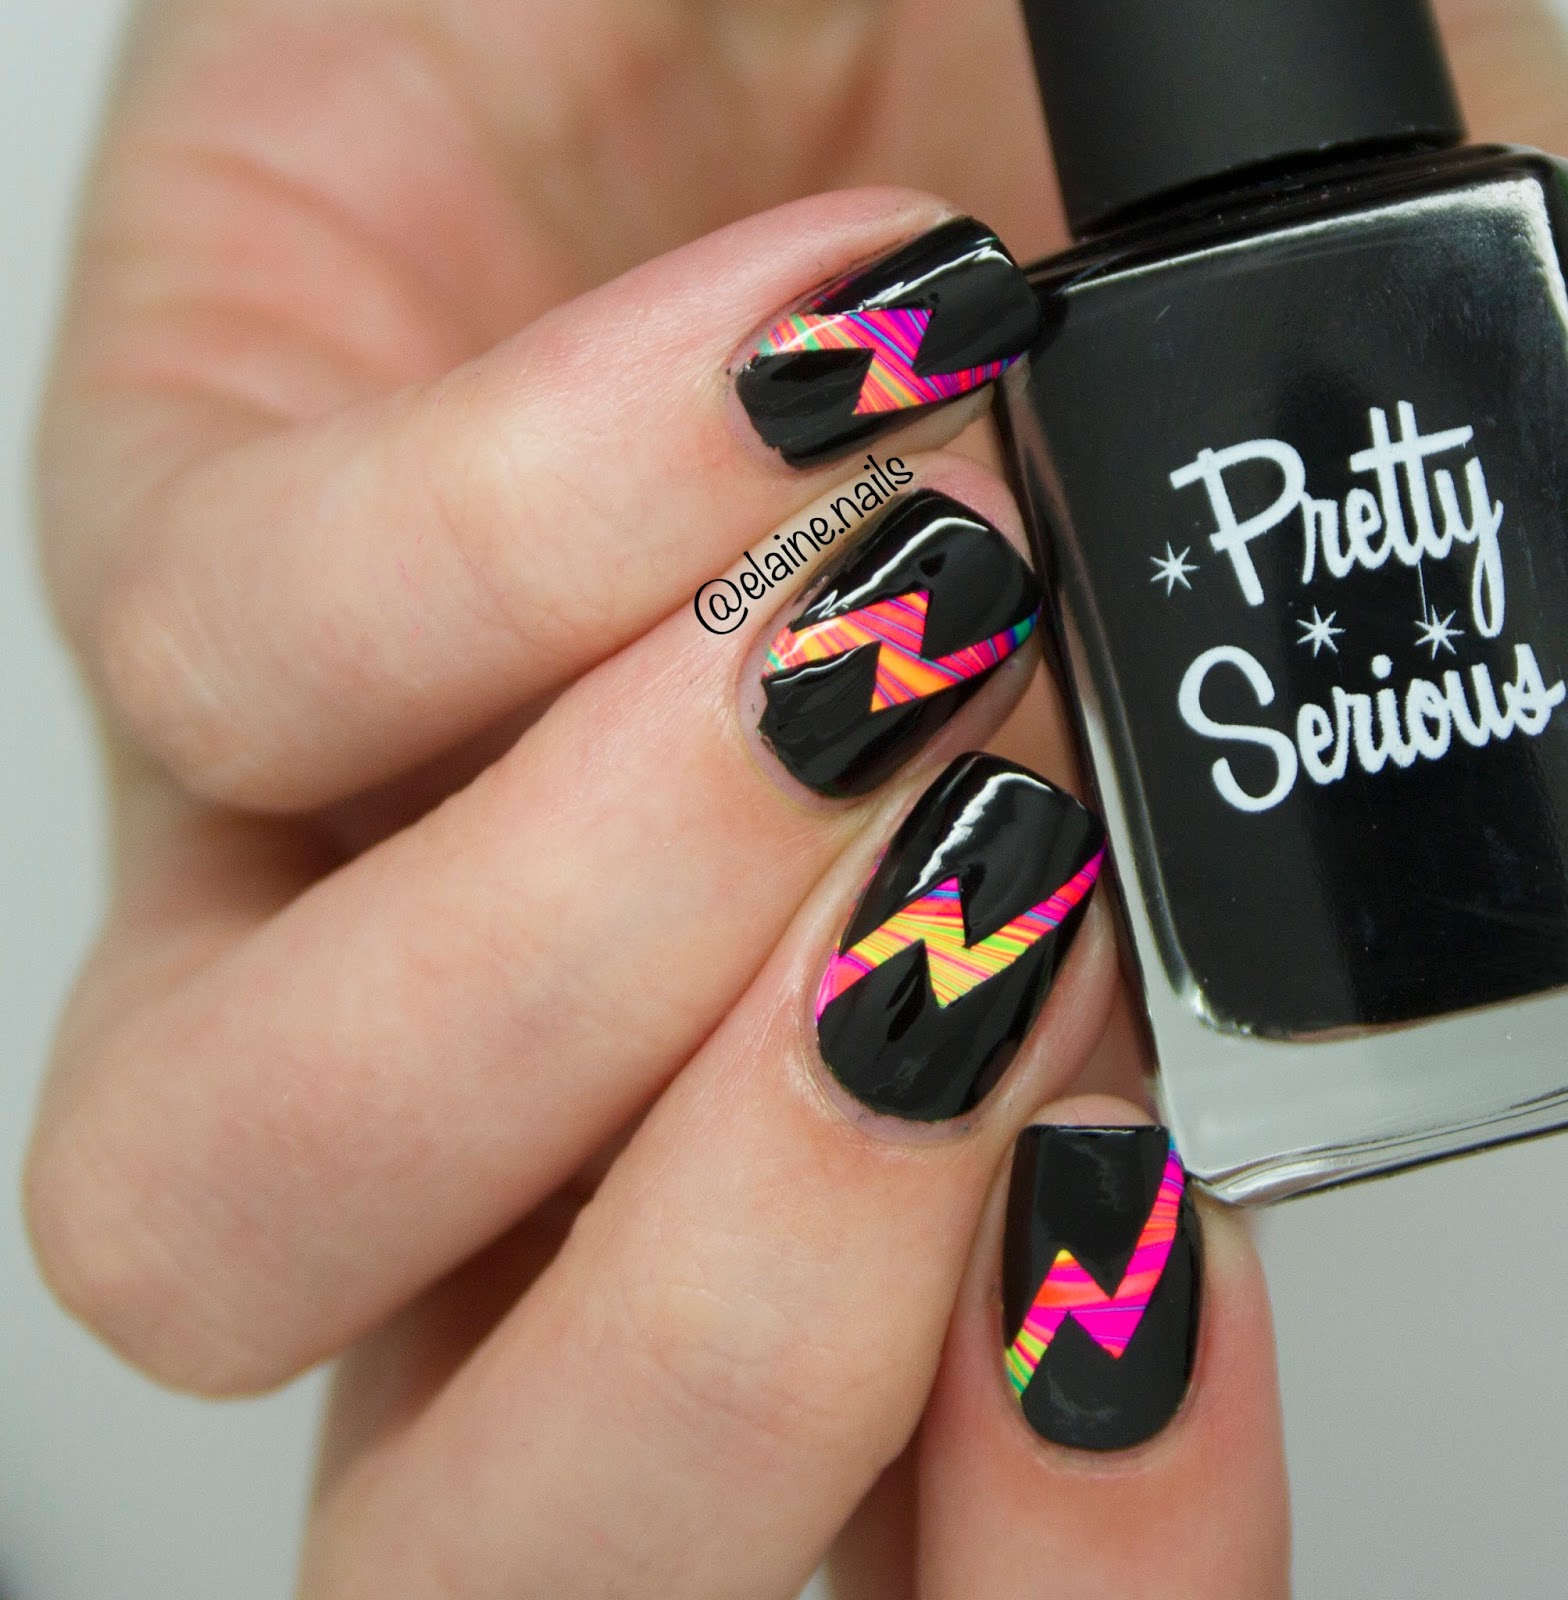
Next I added the lightning bolt stencils from Nail Mail.

I applied black nail polish over the top and while that was still wet I slowly removed the stencil following the shape of the design.

To top it all off and give it that extra sparkle I applied 1 coat of China Glaze Fairy Dust.

This is a very subtle glitter that dries completely flat (not gritty). It's very sparse and gives a magical effect that isn't too overpowering.

That's it!

Remember to check out my video tutorial here!

xx Elaine

Thursday, 10 September 2015

Floral Nail Art Tutorial - Monthly Challenge

My second bestie twin nails this month was with the lovely Mo from @prettyquirkyuk. She's another UK based nail polish lover and I've wanted to do something with her for ages!

The theme was flowers so we plucked some inspiration from a design by @furiousfiler. We kept to the same colour theme, black and white as a background and purple/pink/green/teal flowers. We also added a glittery accent nail!

I have a tutorial for these on my YouTube channel! 

I started off by painting all my nails white, apart from my ring finger.

I then used a small dotting tool and just applied some polkadots. I used the larger end of the dotting tool and applied random blogs of colour onto my nails by the cuticles.

I mixed white with the colour of the blog, eg. I applied a blue blob to my nail, then I mixed that same blue polish with white polish to get a lighter shade of blue.

I then went in with a detail brush from Born Pretty Store and swirled the two shades together.

It seems so weird when I'm writing it, but when you see the video it'll all make sense!


For the glitter nail I applied 3 different glitters onto a sponge. I basically just did a gradient, but applied the glitters to random parts of the sponge.

Again the video will make so much more sense!!

I finished everything off with a topcoat.

Check out the video here!

xx Elaine

Wednesday, 9 September 2015

Coral Nail Art - Monthly Challenge

This month I'm taking part in another monthly nail art challenge. I did it last month as well but kept it all to IG and YouTube. Involving my blog can get a little tricky sometimes as I don't really have much to write about!

I want my blog to be about nail art as well as swatches so I'm thinking of including some super short little posts about what nail art I've done. If I have a video tutorial I'll link it in the post, if not I'll just post a whole bunch of photos!

Not only am I doing a monthly challenge, but to make it even more challenging, I'm actually doing Bestie Twin Nails for every theme! This means that I collaborate with other great nail artists on instagram and we create the same/similar designs.

The first theme was Coral and I collaborated with Veri @verenaamp. Instead of creating corals like the Great Barrier Reef, we decided to use the colour coral instead. We both used Essie Sunday Sunday.

This design is something we've both wanted to do for ages but for some reason neither of us got round to actually doing it... The reason I love doing monthly challenges and working together with other talented nail artists is that it really pushes for to work even harder.

This design was pretty challenging. I always thought it would be super easy for some reason, but the little swirls by my cuticle were a little tricker than I thought they would be.

I used a detail brush from Born Pretty Store and acrylic paint to draw the little swirl floral design. I then used Essie Sunday Funday and painted the tips of my nails like normal. I used a dotting tool to get as close to the acrylic paint design as I could.

To make it look a little more neat I reapplied the acrylic paint. I added some polkadots and that's it!

I unfortunately don't have a tutorial for this design.

xx Elaine

Wednesday, 26 August 2015

Meebox UK Swatch & Review (and nail art!)

Hi everyone!
Today I have something else exciting to share with you! I feel like I start every post like this lately, but I am just honestly so excited with all the new launched here in the UK.

Meebox is the latest launch and it is a brand new monthly subscription service dedicated to all things nails! Meebox has just launched and this is their very first box. They were kind enough to send one to me for review. Meebox will feature the worlds most sought after polish and nail treatment brands and colours as well as the best independent polishes.

I have LIVE SWATCHES of this box on my YouTube channel!

Every month on the 1st Meebox will announce the theme. This month is California Dreaming'. Boxes are limited so you have to be quick! You can either do a one off payment of £20, or receive a discount for long term subscriptions. This way you'll be saving money and you'll never miss a box! The box will ship around the middle of the month with tracking!


Lets get started with the box! The second photo in the post is how I received the box, how cute!? And the third photo is what you see when you open the box. Meebox really took their time when creating this box and these details make a huge difference.

The reason I love subscription boxes is because it's like a little present every month.

Everything was wrapped up nicely so that nothing could break during transit.

The box contains 3 full size nail polishes, 1 mini almond cuticle oil, nail vinyls from What's Up Nail Art Store and 3 empty swatch sticks.

The theme this month was California Dreaming' and I think these colours are perfect, they're bright, vibrant neon colours perfect for hot summer days (if the english weather would cooperate....). The nail vinyls are shaped like palm trees!

First up is Models Own Turquoise Gloss.

This is a beautiful green toned turquoise. It's very vibrant and perfect for summer.

This is part of the hypergel line from Models Own, meaning it's glossy and long lasting like gel polish, but without the curing UV light.

The formula was great. I used 2 coats for the swatch.

The first coat was pretty streaky, but as it dried the streaks actually disappeared! It was still slightly uneven so I did apply a second coat.

It dried super glossy so I didn't need a topcoat.

Next is Disco Dress from Color Club.

This is a very saturated, bright, deep purple.

The formula was a little on the thick side and I needed 2 coats for full opacity.

The first coat was very opaque, but I had some spots that weren't quite covered.

This dried matte so I did apply a topcoat for the swatch.

The last colour is the very famous Flip Flop Fantasy by China Glaze.

This is impossible to photograph so please don't take this swatch to be true to colour.

This is definitely a neon. It's a very orange with a hint of pink.

This is famous for a few reasons. Firstly because it's an absolutely stunning neon. Secondly because the formula has changed and everyone is obsessed with getting both formula. Thirdly because it has the most difficult formula in the world. I might be over exaggerating a little, but it does have a difficult formula.

I used 3 coats for the swatch. The first coat was very streak and uneven. This polish also doesn't self level meaning you don't have a smooth finish on your nail. I applied a thicker second coat, but it was still quite streaky. I used 3 coats for the swatch, but it still wasn't perfect. I would recommend using this over a white base.

It dries matte so I did apply a topcoat for the swatch.

I am definitely a fan of Meebox.

I think it's a great colour selection and the three polishes included come from very popular brands. The nail vinyl from What's Up Nail Store is also a great addition to this box. I also love the fact they added swatch sticks to the box, this way you can try out the polishes even if you've just painted your nails. It's also great if this is your way of organising your stash. I haven't tried the cuticle oil yet, but I'm seriously in love with the smell, it reminds of of almond spicy biscuits I used to eat in Holland <3

And now moving on to the nail art!

I won't go into detail because I have a whole tutorial of these featured in my review video!

I used all three polishes from the box for the gradient and I used the stencil from What's Up Nails. I also used by Barry M Nail Art Pen to draw the ground for the palm trees.


What do you think of the first Meebox? Will you be getting the next one? I can't wait to hear the theme!!

Check out Meebox on Facebook and Instagram for more details!

Meebox Website!