Hi everyone! Today I have a little bit of a different post for you and something I've NEVER done before!
I received some Nail Polish Strips from the brand new Australian based brand Personail. Personail launched their brand on the 23rd of September and they're all about cute nails without hassle and something to fit every occasion.
Their wraps have different "personalities" meaning they have something for everyone. The strips I received are "Charmingly Cute", there is also "Glamour" and "Perfectionist". Charmingly cute has loads of fun, cute, unique and playful prints, Glamour has glitter and metallic designs and Perfectionist has solid colours.
For a brand that has only launched a few days ago, everything looks SUPER professional from the packaging to the website and everything in between.
Before I get started, if you're interested in any of the designs I have a 10% off code for you: EN10
The polish strips cost AU$13 which is roughly £6 (on the 25th of September). Postage to the UK is also very affordable. If you buy 1-2 designs postage is only $3 (£1.38). If you buy 3-4 designs its $6, and shipping is free on orders over $50 (this could be a limited time offer!).
The benefits of adding nail polish strips mean there is zero drying time and no nail polish smell! I paint my nails so often I'm not bothered by the smell anymore, but I always worry about having people come over and as soon as they walk into the house they'll be hit by a cloud of nail polish fumes.
The nail polish strips also last for up to 10 days. I unfortunately wasn't able to test the longevity of the strips because I work as a waitress. I work with a lot of water and I'm constantly polishing cutlery.. nail polish generally lasts through just one shift. I did actually wear this to work and I didn't have any issues with chipping or anything! Plus everyone commented on how cute my nails were ;).
It has a very professional finish - definitely can't argue that! And lastly they fit all nail types! Each pack comes with 16 polish strips so more than enough to do your nails, make a few mistakes and check which size fits best! The pack also comes with a mini file and a cuticle stick.
Another claim is that they're easy to apply. For someone that's never done anything like this before... yes it was easy! I hadn't done any research on how to apply nail polish strips so it was literally going in blind, just the directions on the back of the packaging.
1. The first step is the check which of the strips fit best for each nail. There are quite a few different sizes so there is literally something for everyone.
Before you start you have to make sure you have clean dry nails. I took off all my nail polish (even base coat).
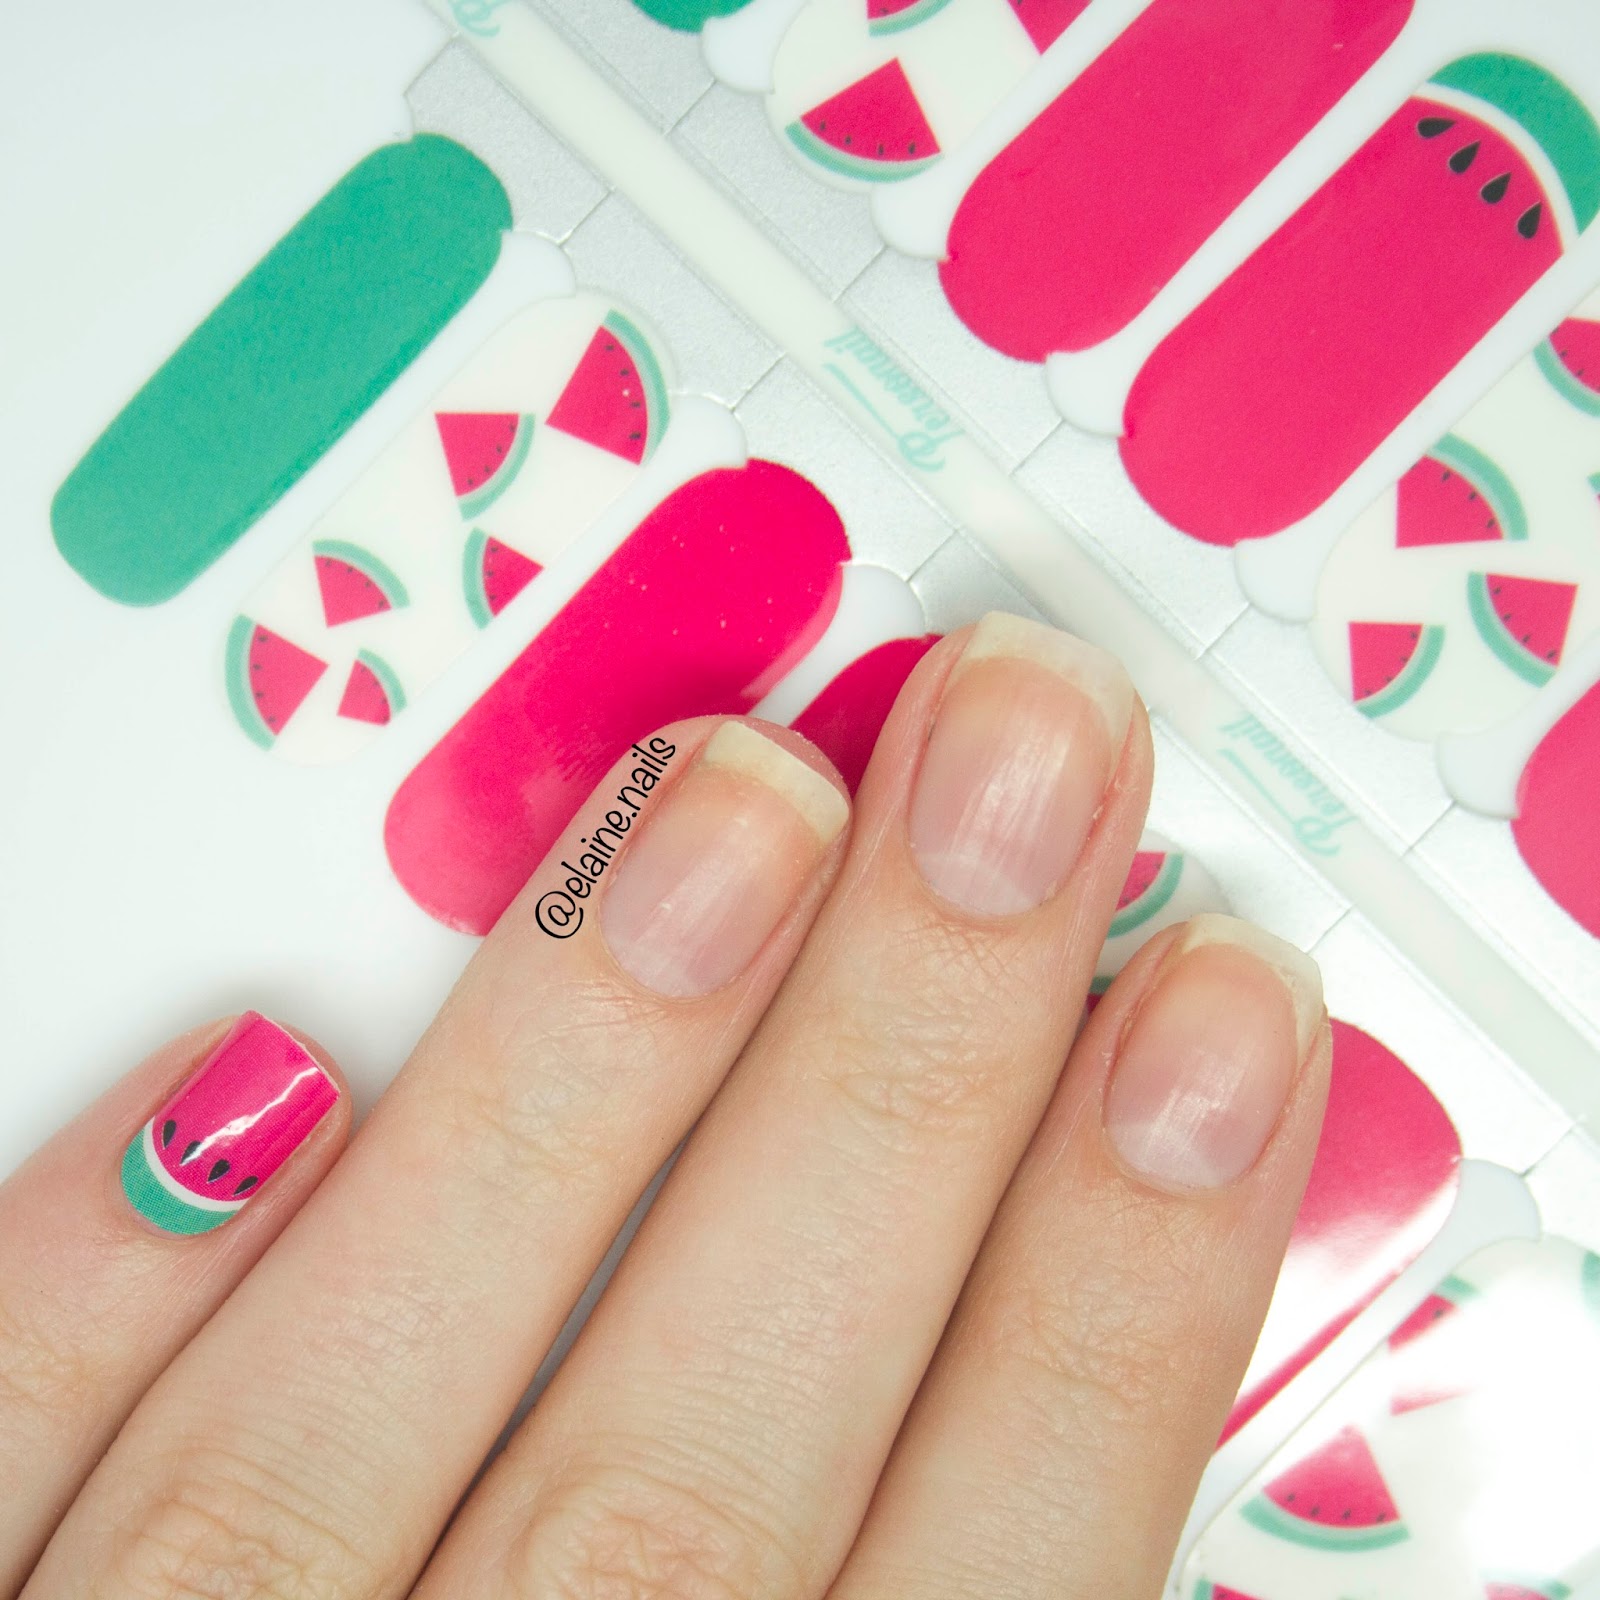
2. Remove clear protective layer, hold silver panel and peel away from back panel.
Right so you'll be able to see in the video I was a little clueless at this point.
I actually pulled the stencils off from the rest, that way I only have one design in my hand to work with. Much easier.
I then removed both the front and the back. The front is a clear film and the back is paper. Now it's time to apply it to my nails...
3. Position sticker on nail holding the silver tab.
This is pretty straight forward. You aline the sticker with you nails and just stick it on there. At this point it's literally just a sticker.
4. Press firmly to smooth over nail surface. File downwards to remove excess.
So you have to make sure you push the stencil all the way down all along the edges of you nails. You don't want anything sticking up! Once it's all smooth you can start filing.
My nails are pretty short so I actually cut the stencil in half and then started filing. Again, much easier!
It's best to file in a downwards motion. Don't worry you're not actually filing your nails down, you're just filing the sticker. As soon as you see your nail poking through you can stop.
I finished it off with a topcoat so it would last longer
Now the best part... doing my other hand!! It was literally the easiest thing every to my my right hand. I always struggle with nail art and it can take AGES! But since I'd got the hand of these stickers my now it was incredibly easy.
That's it!
How cute do they look?!
I love that it's a different design on every nail. I had the little triangle watermelon design on my thumb as well. This is just the most adorable nail design I've every had on my nails.
I am really impressed with Personail. Don't you just love their brand name?
Although nail polish strips isn't something I'd use all the time, I'm really happy I've tried it. This is great for when you have people coming over, but you still want to have cute nails without have to worry about nail polish smells.
This is also great if you're going on holiday and don't want to bring 100 nail polishes and tools for nail art. Just stick these on and you're good to go!
Another bonus is that if you're not very good at nail art or if you don't have a steady hand this is a great way to be able to have beautiful nails! The fact that they are nail polish strips means that it looks like actual nail polish on your nails, no fake nails, no bumpy thick nails. It just looks like a layer of nail polish.
You can be really creative with these strips. I could have easily used the green sticker and it would look completely different.
The price is amazing! For less than £15 you can have two nail polish strips posted! I highly recommend these.
Remember if you're interested in buying some, don't forget to use my discount code EN10 for 10% off your purchase!
xx Elaine
Friday, 25 September 2015
Thursday, 24 September 2015
CM Handmade UK Halloween 2015 Swatch & Review
Hi everyone! Autumn has officially begun so it's time for all the new (amazing!) Autumn and Halloween collections!! I used to not really participate with seasonal nail polish, but this year I've been obsessed with pastels in the spring, then pastel neons, then full on in your face neons and now it's time for some deeper reds and cobalt blues.
Today I have the Halloween collection from CM Handmade UK! I have reviewed for them a few times before, to check out all my other blog posts click here! CM Handmade UK is a relatively new UK based indie nail polish brand run by 2 sisters. Alongside their nail polishes they also sell crafts, ornaments, wax melts and more. The Halloween collection has to be my favourite collection they've launched. It literally just screams Halloween! It consists of 3 crelly cremes, 1 holo and a glitter topper. They're available to buy in a set for only £10 plus postage!!
As always, I have LIVE SWATCHES of these on my YouTube channel!
First up is Frankenstein.
This is a bright slime green. Maybe I'm thinking slime because it's a halloween collection...
It's incredibly bright!
I used 2 coats for the swatch.
It's a bit more a crelly formula, right in between a creme and a jelly. It applies beautifully. It's not streaky but there is a slight visible nail line so definitely needs second coat. The second coat really brightens up the green.
It dries to a glossy finish, I didn't apply topcoat for the swatch.
Next is Pumpkin.
This is a fiery red orange. It's definitely an orange with a lot of red tones.
This is another crelly polish. It has that gorgeous squishy feel to it.
I applied 2 coats for the swatch.
The first coat is almost fully opaque, literally the best formula ever. There is a slight visible nail line so I did require a second coat.
It dries to a glossy finish.
This is Witches Brew.
This is a very vibrant blue based purple.
It was a little bit more sheer than the previous 2 polishes but built up in 3 coats.
My bottle had a few unresolved pieces of pigment leaving it with a slight gritty finish. This didn't affect how the polish applied but I'd recommend applying a topcoat. It dries to a little bit of a dull finish so I'd recommend adding one anyway!
The glitter topper is called Trick Or Treat and it's adorable!!
I'm definitely not a huge glitter topper fan, and I've always stayed well away from anything skulls but these are just the cutest little holographic glitter skulls!!
This polish has green, purple, black and fiery orange hex glitter - matching all the polishes in this collection. It also has larger orange hexes and holographic skulls.
I had to do a little fishing for the larger glitters, but it wasn't anything more than other glitter toppers.
The great thing about this topper is is that it would look good over any of the polishes in this collection!
The last polish.... is amazing!!!
This is Vampire Bat and it's a black holographic polish.
I have had the biggest holo obsession lately and I think black holos are my newest obsession.
This has quite a large holo micro glitter.. if that makes sense? It looks like silver glitter in dull lighting, although you can see a hint of rainbow. Once you get in the sun/flash or the right lighting it just blows up!
I'm obsessed.
I used 2 coats for the swatch. It's almost fully opaque in 1 coat, although a second coat really deepens up the colour. It dries to a bit of a dull finish so I would recommend adding a topcoat.
That's it for the CM Handmade UK Halloween 2015 collection! All polishes are available right now! Check out their etsy shop for all their other products!
xx Elaine
Friday, 11 September 2015
Rainbow Lighting Bolt Nail Art - Maniswap
Of course doing Bestie Twin Nails for every challenge this month isn't busy enough... I also had to do a mani swap with Leanne from @leasnails!
I love her account and she's just started her very own indie nail polishes called Charming Tale!
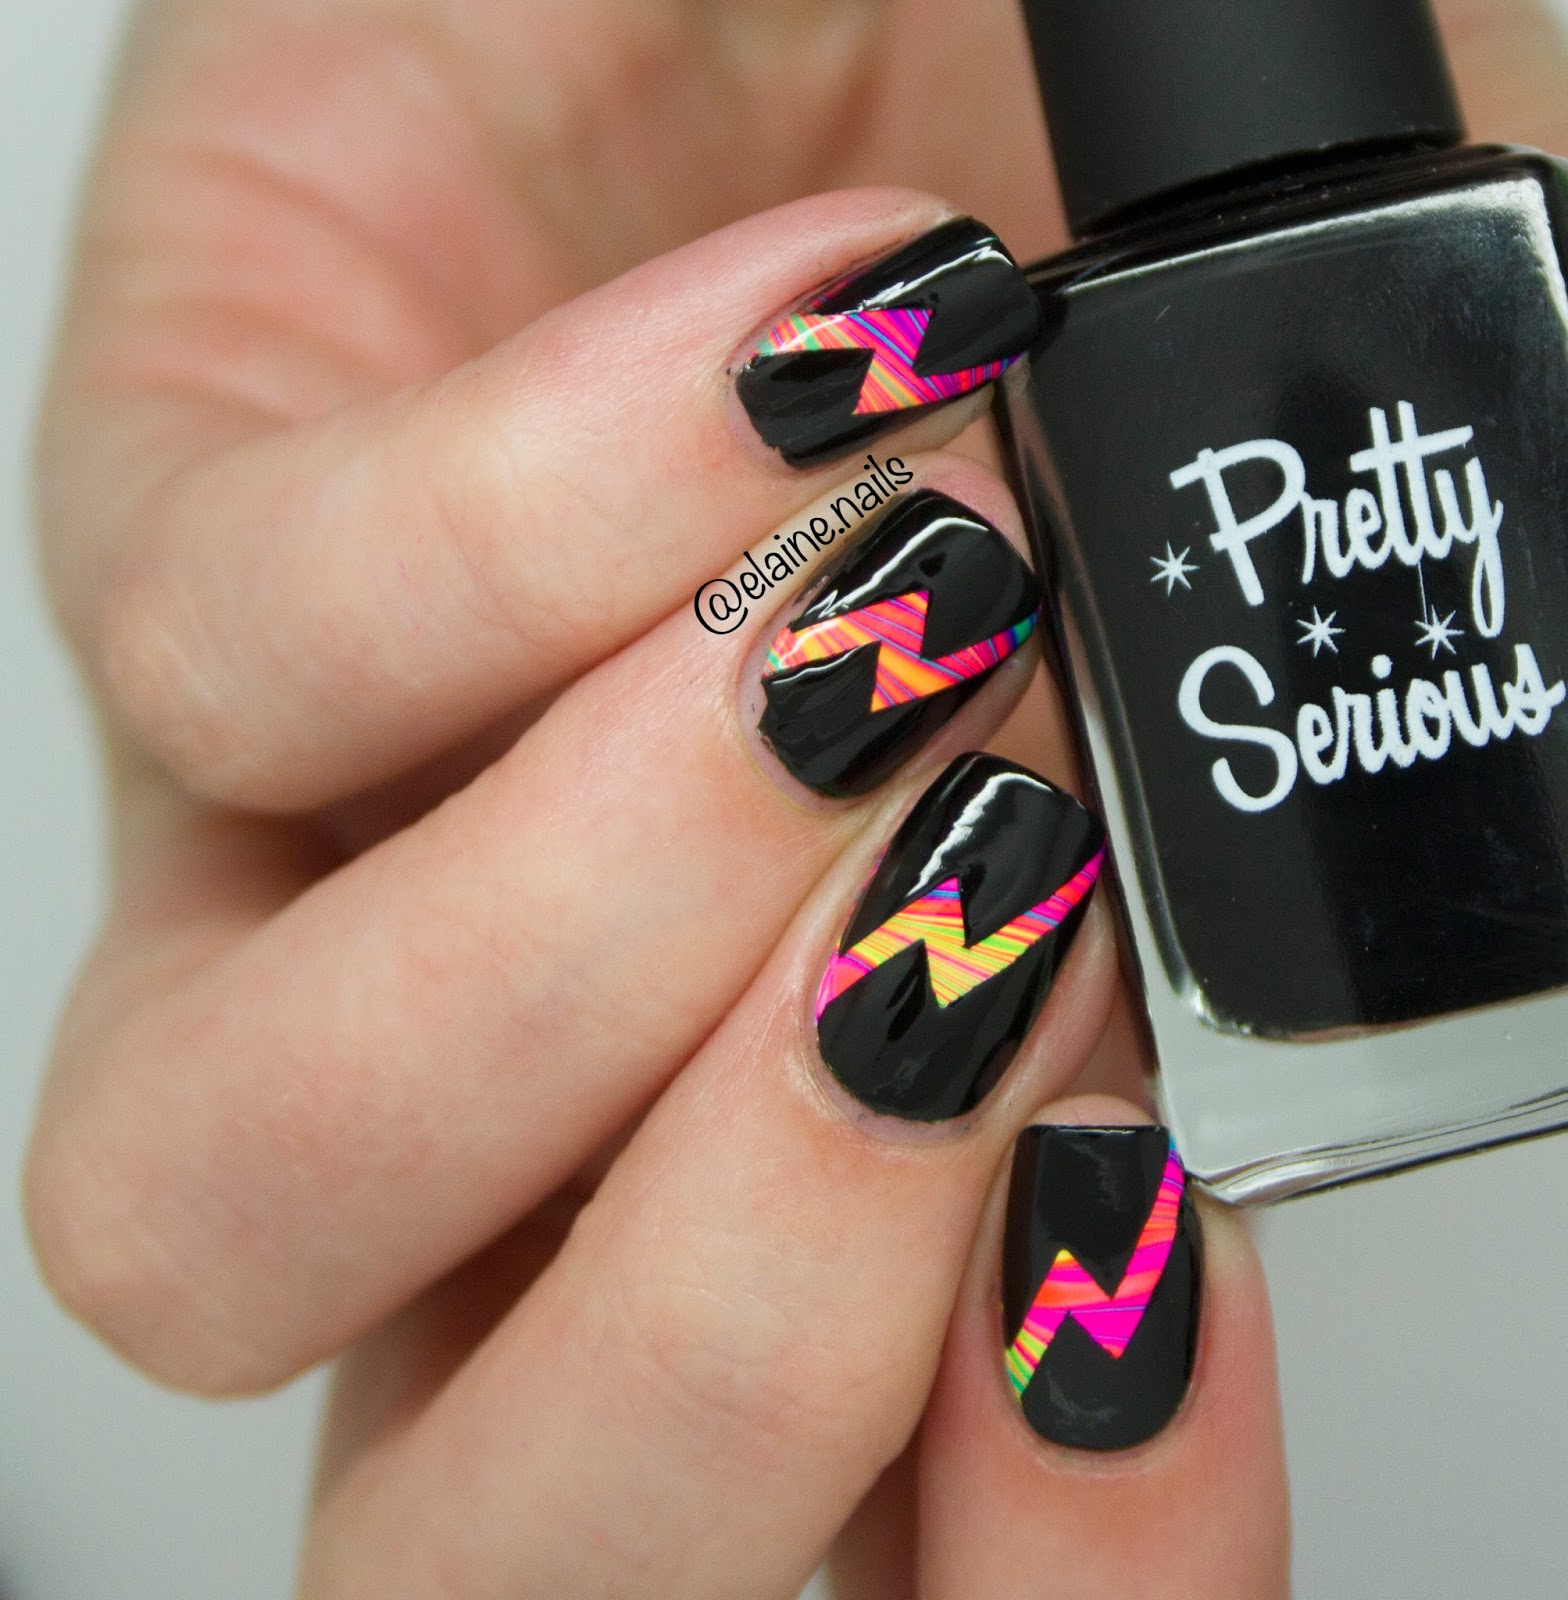
I decided to recreate her rainbow watermarble lightning bolt glitter nails and she did my mermaid nails! We even tried to copy each others nail poses... spoiler alert I LOVE her handpose and you might be seeing it pop up more often ;).
I have a video tutorial of these nails on my youTube channel!
I started off creating a watermarble design. Of course I used my Pipe Dream Polish A Night In Vegas collection polishes because that's the only thing I can successfully marble with.
In the video I show how I created this design. I add a drop in every colour twice and create the normal flower design. I then swirl from the top to the bottom to get this design. Does that make sense? Probably not...
Anyway I create the flower design first and then drag it back and forth because I feel like it mixes the colours better.
I applied a topcoat and waited for a good 15-20 minutes before moving on to the next step.. I wasn't taking any chances!
Next I added the lightning bolt stencils from Nail Mail.
I applied black nail polish over the top and while that was still wet I slowly removed the stencil following the shape of the design.
To top it all off and give it that extra sparkle I applied 1 coat of China Glaze Fairy Dust.
This is a very subtle glitter that dries completely flat (not gritty). It's very sparse and gives a magical effect that isn't too overpowering.
That's it!
Remember to check out my video tutorial here!
xx Elaine
Thursday, 10 September 2015
Floral Nail Art Tutorial - Monthly Challenge
My second bestie twin nails this month was with the lovely Mo from @prettyquirkyuk. She's another UK based nail polish lover and I've wanted to do something with her for ages!
The theme was flowers so we plucked some inspiration from a design by @furiousfiler. We kept to the same colour theme, black and white as a background and purple/pink/green/teal flowers. We also added a glittery accent nail!
I have a tutorial for these on my YouTube channel!
I started off by painting all my nails white, apart from my ring finger.
I then used a small dotting tool and just applied some polkadots. I used the larger end of the dotting tool and applied random blogs of colour onto my nails by the cuticles.
I mixed white with the colour of the blog, eg. I applied a blue blob to my nail, then I mixed that same blue polish with white polish to get a lighter shade of blue.
I then went in with a detail brush from Born Pretty Store and swirled the two shades together.
It seems so weird when I'm writing it, but when you see the video it'll all make sense!
For the glitter nail I applied 3 different glitters onto a sponge. I basically just did a gradient, but applied the glitters to random parts of the sponge.
Again the video will make so much more sense!!
I finished everything off with a topcoat.
Check out the video here!
xx Elaine
Charming Tale Haul Swatch & Review
Today I have a haul to show you! Leanne, @LeasNails on Instagram, recently launched her own indie brand called Charming Tale polish and I'm obsessed. She sent me one nail polish to review before her launch, check it out here!, and I purchased 6 minis. Leanne has created 2 collections, The Fairy Godmother collection and Fairest Of Them All collection, as well as some nail care items.
As always, I have live swatches of all of these polishes on my YouTube channel!
I'll start off with the Fairy Godmother collection!
This is Flora a slightly pink toned red.
Anyone that knows me, knows that I'm obsessed with reds.
Flora has the most amazing formula. It is a little bit on the thick side, which I love, but because of that it only required ONE coat.
I just used 1 coat for the swatch and no topcoat. It's perfection in a bottle.
The second polish from the collection, which is unfortunately not available anymore, is Fauna.
This is a Shrek green. It's a weird colour to describe, it's quite a yellowy chartreuse but definitely still olive green. You know?
Anyway, it's a gorgeous polish. Definitely not something I'd usually go for, but still very pretty.
I used 2 coats for the swatch and no topcoat.
The first coat was slightly streaky and not fully opaque, but the second coat covered everything up.
The third creme in this collection is Merryweather.
This is a bright medium blue.
This was another ONE coater!
The formula was the same as Flora, it was a little thicker, but super easy to work with, and was opaque in just 1 coat.
Again, I didn't use a topcoat.
The last polish in this collection is called Fairy Dust and it's a silver holographic glitter polish with some very fine silver shimmer.
I used 3 coats for the swatch.
It's a very dense glitter and it was very easy to apply. It has a very full coverage on the first coat so I wouldn't recommend using this as a topper.
The silver shimmer really helps build up the opacity and makes it different from other silver holographic glitters.
The next few polishes are from the Fairest Of Them All collection.
This first polish is Mistress Of All Evil.
This is the polish I previously reviewed on my blog so I won't go into much detail.
I used 2 coats for the swatch and no topcoat.
It's beautiful!
The newest polish to Charming Tales is The Huntsman, and this has been added in the second restock.
This is a dark blue base filled with silver shimmer.
I used 2 coats for the swatch.
It was a little sheer on the first coat and there was a definite visible nail line. The second coat really deepened up the colour and covered up any VNL.
The last polish I have to show you today is Magic Mirror and this is a gold holographic glitter.
I used 2 coats for the swatch. I had a bit of a weird brush so it was picking up too much nail polish. I would recommend doing 3 thinner coats rather than 2 thick ones.
This is a gorgeous glitter and it looked very bling on the nails. Again it was very dense so I wouldn't recommend using it as a topper.
Those are all my Charming Tale polishes, I think they're all great quality and it's an amazing start for such a new indie brand.
Check out Charming Tale on Instagram for more info and swatches!
Wednesday, 9 September 2015
Coral Nail Art - Monthly Challenge
This month I'm taking part in another monthly nail art challenge. I did it last month as well but kept it all to IG and YouTube. Involving my blog can get a little tricky sometimes as I don't really have much to write about!
I want my blog to be about nail art as well as swatches so I'm thinking of including some super short little posts about what nail art I've done. If I have a video tutorial I'll link it in the post, if not I'll just post a whole bunch of photos!
Not only am I doing a monthly challenge, but to make it even more challenging, I'm actually doing Bestie Twin Nails for every theme! This means that I collaborate with other great nail artists on instagram and we create the same/similar designs.
The first theme was Coral and I collaborated with Veri @verenaamp. Instead of creating corals like the Great Barrier Reef, we decided to use the colour coral instead. We both used Essie Sunday Sunday.
This design is something we've both wanted to do for ages but for some reason neither of us got round to actually doing it... The reason I love doing monthly challenges and working together with other talented nail artists is that it really pushes for to work even harder.
This design was pretty challenging. I always thought it would be super easy for some reason, but the little swirls by my cuticle were a little tricker than I thought they would be.
I used a detail brush from Born Pretty Store and acrylic paint to draw the little swirl floral design. I then used Essie Sunday Funday and painted the tips of my nails like normal. I used a dotting tool to get as close to the acrylic paint design as I could.
To make it look a little more neat I reapplied the acrylic paint. I added some polkadots and that's it!
I unfortunately don't have a tutorial for this design.
xx Elaine
Tuesday, 8 September 2015
Dark Metal Lacquer Swatch & Review
I received some polishes from the UK indie brand Dark Metal Lacquer to review. This is a brand I've wanted to try for the longest time because they have some absolutely stunning holographics! Dark Metal Lacquer uses a 5 free, cruelty free and EU approved nail polish base. The full size nail polishes for 11ml retail for £6.50. Check out their website here for all their stunning polishes!
I received 4 polishes. Two absolutely stunning pastel linear holographics, one deep purple linear holographic and a crazy party glitter polish that can be used on it's own or 1 coat over a dark base.
As always, I have live swatches of these on my YouTube channel!
First up is End Of August.
This is part of the pastel holographics collection.
This is a beautiful pastel baby blue linear holographic polish.
I used 2 coats for the swatch.
The first coat has great coverage for being such a light holographic shade, but you definitely need a second coat.
The second coat brightens up that blue and it's fully opaque. I did do 2 careful coats and I could see how this could easily be a three coater.
The holo is very subtle in dull lighting, but as soon as the sun/flash/torch hits it the holo pops!
The second pastel holo is Not Tomorrow.
This is a pastel pink linear holo with a hint of purple. the colour really reminds me of Lucky Lucky Lavender by OPI, but that's just a creme.
I used 2 coats for the swatch.
This had the same formula as End Of August. It has great coverage on the first coat but you definitely will need a second coat. The application is very even and easy to apply.
This was definitely a 2 coater and I wouldn't even consider adding a third.
The third linear holo is called Dreaming.
This is a very rich bright purple holographic. The holo in this polish is definitely the most apparent from the 4.
I used 2 coats for the swatch.
It has a very similar formula as the previous 2 polishes. It applies very evenly and has a smooth formula. It is a little sheer on the first coat but the second coat covers everything up beautifully. It also deepens up that purple.
All 3 linear holographic dry to a semi glossy slightly dull finish so I would recommend adding a topcoat.
Next up is a glitter polish called Vicinity of Obscenity.
This has a little bit of everything in there!
I can see purple, gold, blue, green glitter, maybe even some red and holographic glitter! It has 2 sizes, tiny hex glitters as well as shimmer.
For the live swatches I applied 3 coats on its own (photos below). Here I used 1 coat over a black base.
Although it is beautiful on its own, the colours really pop over a black base and I kept seeing a stunning flash of purple-ly fuchsia.
Those are the 4 nail polishes I received from Dark Metal Lacquer. I am honestly not sure which one is my favourite. I think the two pastel holographs are so unique and I don't have anything like it in my collection. The purple linear holographic, Dreaming, is absolutely stunning but definitely not unique. This is the type of holo that I send to gravitate towards so I love it! The glitter is again very unique, there is so much going on in it! I love that it can be used on its own in 3 coats (it looks like a carnival!) or as a vampy glitter topper over a darker base.
Check out Dark Metal Lacquers' website for all their polishes and their Instagram for many more swatches!
xx Elaine
Subscribe to:
Posts (Atom)