Showing posts with label pretty serious. Show all posts

Wednesday, 21 October 2015

Bonprix UK Nail Art Competition #PartyPolished

Today I have a very late entry to the Bonprix UK nail art competition! Bon prix is an online clothing retailer with tons of beautiful outfits! For the competition I had to take inspiration from one of their affordable party wear collection dresses. They gave 6 different dresses ranging from colour block to animal print, sequin, lace, everything! I literally had an idea for every dress. The first prize winner will win a £50 voucher to spend at Bonprix as well as lots of Barry M goodies. Second and Third place will win the dress that they were inspired by along with 4 Barry M speedy quick dry nail polishes.

I was in LOVE with this gorgeous lace dress and if I were to win any of the dresses, this is the one that I'd want! :D

I had a very clear idea in my mind, but it's a technique I'd never done before... I was very nervous!

I am absolutely rubbish at anything stamping, I just fail every single time. But the only way to get a gorgeous lace pattern was to stamp, I am rubbish at stamping, but trying to create a design like this freehand would be an even bigger disaster!

I started off by creating my own sheer black polish. I just added a few drops of my black polish into a topcoat that I never use. I applied to coats to my nails.


I used Pretty Serious cosmetics Absence for the stamping. It worked great at picking up the full image, but for some reason I had issues trying to transfer the image onto my Uber Chic mat. That's probably my fault - like I said, I can't stamp to save my life!

So I applied a topcoat to my design on my stamper. I let it fully dry and then slowly and carefully peeled it off using tweezers. I applied topcoat and then applied it onto my nails, almost like a sticker (see below!).

I used my clean up brush to get rid of the excess nail polish.


I then used the same technique to add the white lace bits.

This time I used Pretty Serious Cosmetics Presence, it's a 1 coat white!

I carefully placed the white lace design onto the edges of my middle finger and ring finger.

I applied a topcoat to smooth everything out.

To finish off the design I added a black outline. I feel like it makes the design look much more completed.

I am seriously in love with it.

This is something I've never done before, I photographed every step of the way, just in case I messed up somewhere!

I love how delicate it is, it's very feminine and unique.

Check out Bon Prix and all their lovely dresses!

The competition ends TONIGHT at midnight!

Thursday, 1 October 2015

Nail Mail Nail Art Stencils - How To

I've been using nail art stencils from Nail Mail for the longest time and although I use them in tons of tutorials, I've never actually done a post exclusively on the stencils!

I bought my first nail art stencils ever from Nail Mail and sent Kelly, the mastermind behind Nail Mail, a few photos of my designs. They were pretty rubbish back then to be honest. I didn't really know what I was doing!

Ever since then Kelly and I have been working together. She has sent my crazy amounts of her stencils and I happily use them for my nail art. She never asked me to use them, promote them or review them, I just genuinely enjoy using them.

I created this single chevron zig zag-y look. This stencil is called the Chevron Points.

I started off with a cobalt blue base. I applied 2 coats and then applied a fast drying topcoat. I waited for a good 10 minutes before doing anything else.

It's important to wait until the nails are 100% dry. If your nails touch dry but still wet underneath you'll pull the nail polish off with the stencil! I have to say... this is something I've done more than once!!

Once you've waited (at least) 10 min, you can apply the stencil. Just pull it off the paper and carefully put it on your nails. I tend to just use my hands for this, no fancy tweezers! But I know a lot of people find it easier to apply it with tweezers. I don't have very steady hands using my hands gives that extra bit of support.

Once you've put the stencil on your nail you have to make sure it's pushed down properly. Not just the top of you nail, but you also have to push it down properly around your cuticles. Again you can use the tweezers to push it down, or a cuticle pusher.. I just use my nails. If the stencil isn't pushed down properly you can have polish leaking underneath the stencils and you won't have those crips lines.

Now it's time to apply your second colour!

I used a contrasting black polish.

When applying the nail polish I try to stick to the design of the stencils. So for this stencil I painted the cuticle area first, and then just filled in the zig zags.

I find that when I just paint my nail like I normally would I get too much polish on the stencil itself and it could get a little messy removing it.

Another easy peasy way of getting crisp lines without any risk is the sponge the second colour on. Like you're doing a gradient, but just 1 solid colour! This way you won't run the risk of adding a too thick of a coat and ruining the design when you're pulling the stencil off.

Once you've applied your second colour it's time to remove the stencil. You want to remove the stencil when the nail polish is still went. Do it ASAP! If the nail polish dries you'll pull off all your nail polish or the stencil could break. Don't rush though, take your time when pulling the stencil off. I follow the design of the stencil so for these I pull it up and down following the zig zag. The stencil is pretty sturdy so as long as the polish is still wet, you won't break it.

The last step is to apply top coat!

I wait another 10+ minutes before applying top coat to any design. Topcoat has this horrible tendency to smear designs. It's literally THE worst.

Normally I take photos pre top coat and after - JUST in case I smudge a design.

If you're really worried about ruining your design, you can apply 2 coats of topcoat. The first coat will follow the zig zag design, once that's dry you can add a normal topcoat. This way you won't run the risk of smudging the 2 colours together.

I used to apply top coat like I would apply any polish, but I've learned to only have the polish touch your nail, not the brush. Does that make sense? I use a very very light touch so I'm not pressing the brush onto my nail. This also helps eliminate the design smearing all over the place.

That's it!

I feel like it sounds a whole lot more complicated that it really is. The most important step is actually the first step. Make sure your base colour is 110% dry before even starting anything else. It's happened so many times that I create this great design, pull off the stencil and the nail polish comes off with it! Trying to fix that is more work than starting all over again...

I hope this was a helpful guide on how to apply nail stencils!
xx

Wednesday, 30 September 2015

Jungle Nail Art - Monthly Challenge

This month I'm taking part in a monthly nail art challenge Clairestelle8 created on Instagram. Every couple of days there is a different theme. To make it even crazier, I decided to do bestie twin nails for every theme!

The theme for the 19th was Jungle and I collaborated with Ebba from @nailsby_ebba.

We decided to do a colourful leopard print design!

I don't have a tutorial for these, honestly I'm not very good at leopard print!

To check out all the other themes this month, click here!


I started off with a white base using Pretty Serious Presence. This is a 1 coat white!!

After that I just apply some random blobs in different colours. Yep very technical!

I used all Kester Black polishes for this:
Tutti Fruiti (gorgeous purple I'm holding in the other photo!), Alimony (the turquoisey green), Blue Raspberry (cobalt blue) and Sorbet (raspberry pink).

I finished it off by outlining the blogs using my Barry M nail art pen. This is pretty much like a sharpie! It's super easy to use. You don't get the thinnest lines, but for something like this it's perfect!

That's it!
xx

Sunday, 27 September 2015

Mermaid Nail Art Born Pretty Store Review - Monthly Challenge

Today I have another nail art design to show you from #clairestelle8sept monthly challenge!

This month I'm taking part in a nail art challenge where every couple of days there is a different theme. To make it even crazier, I decided to do bestie twin nails for every theme!

The theme for the 12th of September was Mermaid and I collaborated with Bethany from @bnailedtoperfection. We decided on doing the mermaid design on the middle and ring fingers and using shell studs on the pinky and index finger. And our general theme was blue.

I loved how both of ours turned out!

I didn't create a tutorial on these, however I have something very similar on my channel already here!

Check out all my other designs for this challenge here!


I started off by painting my outer 2 fingers black and my middle 2 fingers white.

I applied a fast drying topcoat to my middle and ring finger and waited for a good 10 min before doing anything else.

I applied some liquid latex around my nails (Charming Tale Practical Magic) and once that was dry I placed the mermaid scale stencil onto my nails.

I first sponged black polish over the stencil. The black base will really make the shimmery polishes pop.

I used a cheap Primark cosmetics sponge and applied Charming Tale The Huntsman and Frightfully Spectacular Orinoco Flow in random positions on the sponge.

I then dabbed it onto my nail, like any other gradient.

I applied 2 "coats".

When the nail polish was still wet, I gently pulled the stencil off, the liquid latex barrier will peel off at the same time.


For the studs I used this set up studs from Born Pretty Store (#20312). This comes in a case and has all sorts of different studs including stars, hearts, seashells, pointed studs, square studs and much more! Most things come in both silver and gold!

I love that it comes in a little box instead of little plastic bags. It's incredibly easy to keep organised this way!

I used the silver seashell studs. They're super cute and worked perfectly with the mermaid scale design.

I applied a dot of topcoat onto the base of my index finger and pinky. I can carefully picked up a seashell stud with a pair of tweezers and applied it onto my nail.

That's it! I really like how this design turned out! I love the subtle mixed gradient of the mermaid nails and the studs really help bring the look together.

xx Elaine


Friday, 11 September 2015

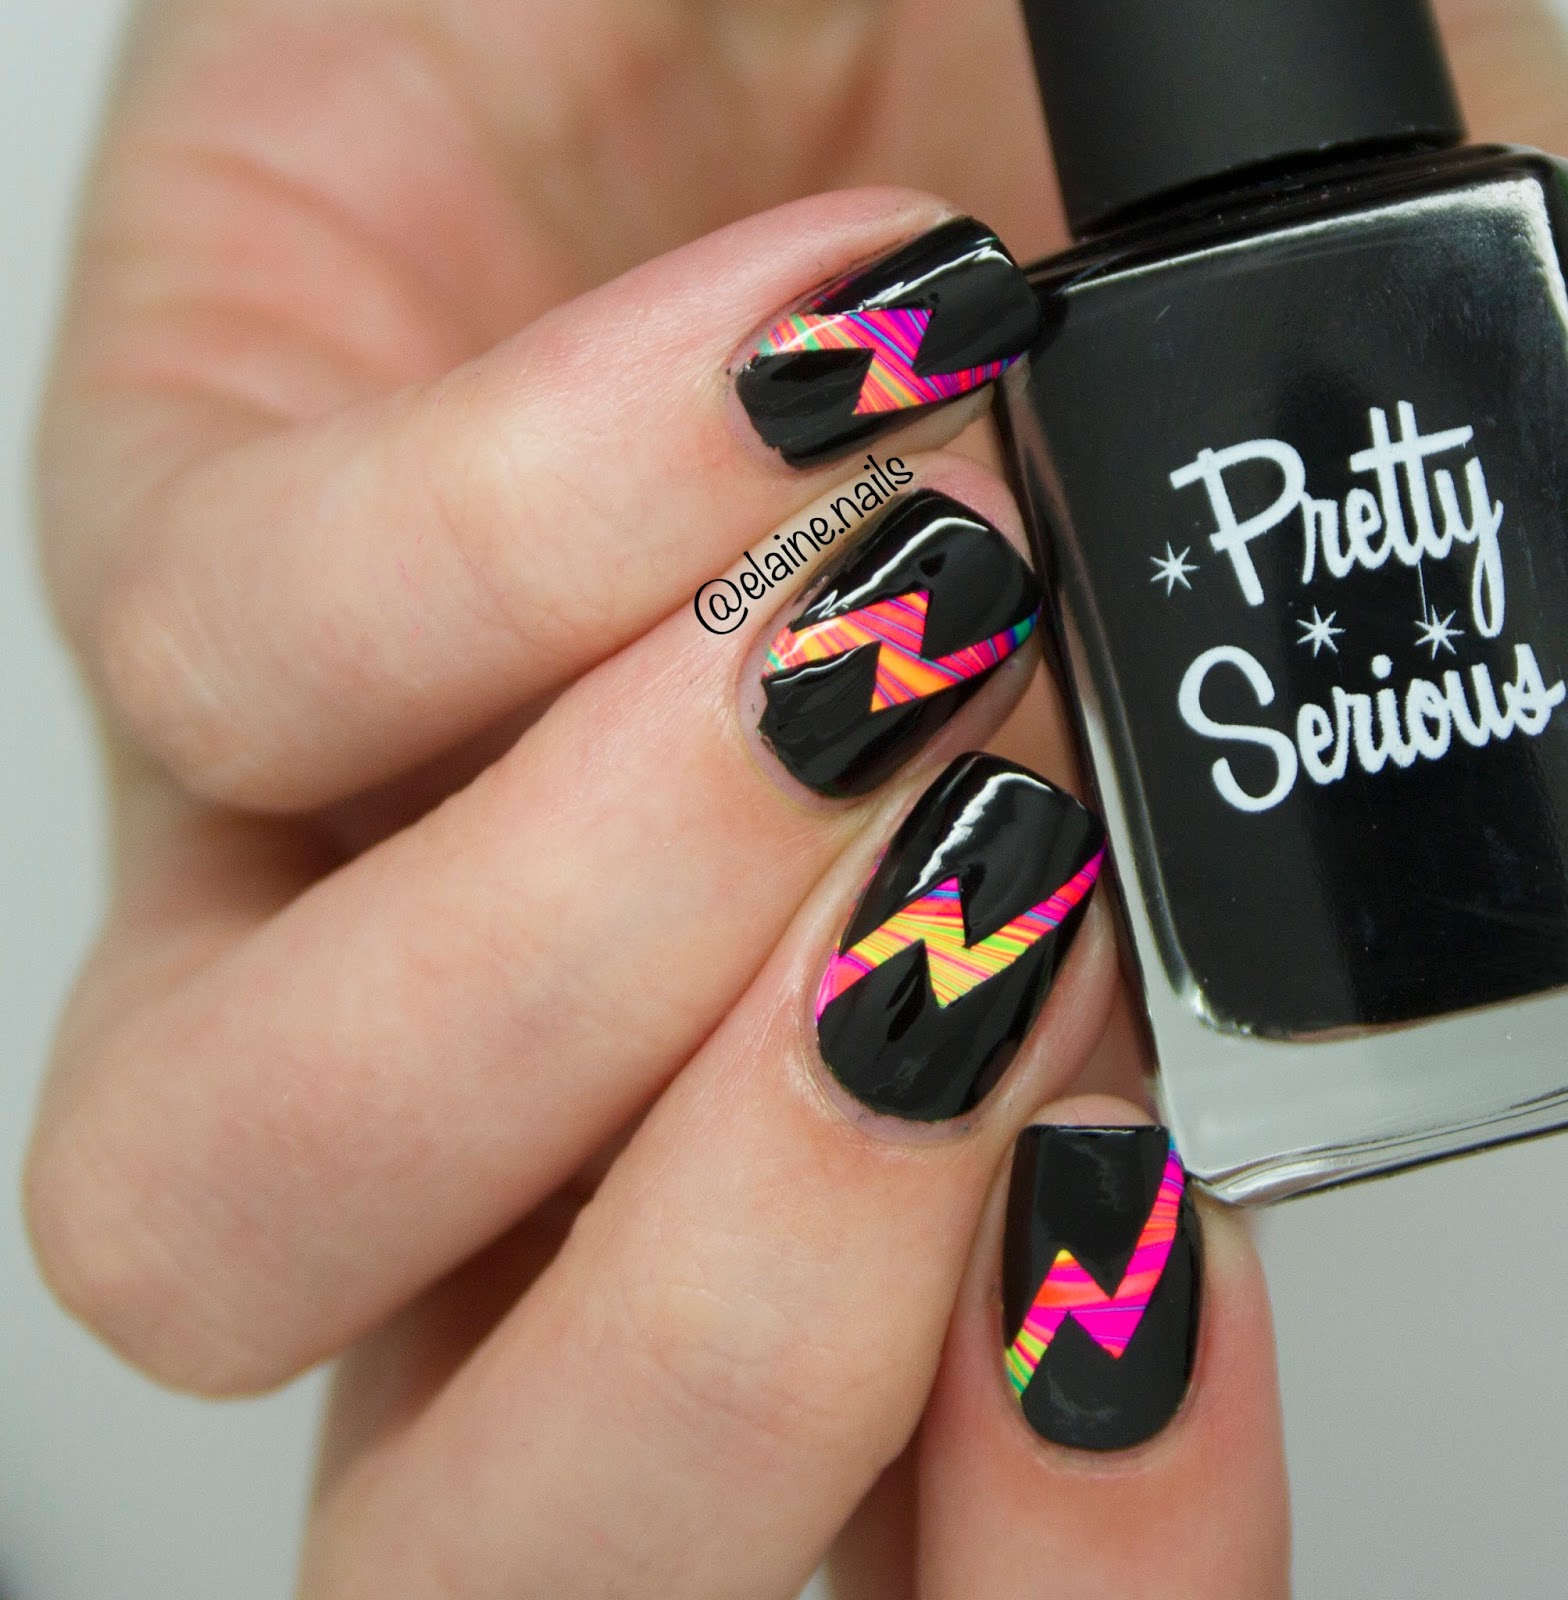
Rainbow Lighting Bolt Nail Art - Maniswap

Of course doing Bestie Twin Nails for every challenge this month isn't busy enough... I also had to do a mani swap with Leanne from @leasnails!

I love her account and she's just started her very own indie nail polishes called Charming Tale!

I decided to recreate her rainbow watermarble lightning bolt glitter nails and she did my mermaid nails! We even tried to copy each others nail poses... spoiler alert I LOVE her handpose and you might be seeing it pop up more often ;).

I have a video tutorial of these nails on my youTube channel!


I started off creating a watermarble design. Of course I used my Pipe Dream Polish A Night In Vegas collection polishes because that's the only thing I can successfully marble with.

In the video I show how I created this design. I add a drop in every colour twice and create the normal flower design. I then swirl from the top to the bottom to get this design. Does that make sense? Probably not...

Anyway I create the flower design first and then drag it back and forth because I feel like it mixes the colours better.

I applied a topcoat and waited for a good 15-20 minutes before moving on to the next step.. I wasn't taking any chances!

Next I added the lightning bolt stencils from Nail Mail.

I applied black nail polish over the top and while that was still wet I slowly removed the stencil following the shape of the design.

To top it all off and give it that extra sparkle I applied 1 coat of China Glaze Fairy Dust.

This is a very subtle glitter that dries completely flat (not gritty). It's very sparse and gives a magical effect that isn't too overpowering.

That's it!

Remember to check out my video tutorial here!

xx Elaine

Thursday, 10 September 2015

Floral Nail Art Tutorial - Monthly Challenge

My second bestie twin nails this month was with the lovely Mo from @prettyquirkyuk. She's another UK based nail polish lover and I've wanted to do something with her for ages!

The theme was flowers so we plucked some inspiration from a design by @furiousfiler. We kept to the same colour theme, black and white as a background and purple/pink/green/teal flowers. We also added a glittery accent nail!

I have a tutorial for these on my YouTube channel! 

I started off by painting all my nails white, apart from my ring finger.

I then used a small dotting tool and just applied some polkadots. I used the larger end of the dotting tool and applied random blogs of colour onto my nails by the cuticles.

I mixed white with the colour of the blog, eg. I applied a blue blob to my nail, then I mixed that same blue polish with white polish to get a lighter shade of blue.

I then went in with a detail brush from Born Pretty Store and swirled the two shades together.

It seems so weird when I'm writing it, but when you see the video it'll all make sense!


For the glitter nail I applied 3 different glitters onto a sponge. I basically just did a gradient, but applied the glitters to random parts of the sponge.

Again the video will make so much more sense!!

I finished everything off with a topcoat.

Check out the video here!

xx Elaine